When Tabitha Sewer of TJSewer asked me to collaborate with her on a Celebrity Inspired look I was ECSTATIC, to say the least. We quickly went to work trying to decide exactly what star we would use as our inspiration. It didn\’t take long for us to both agree that Lupita Nyong\’o was the way to go! We decided that we would not tell each other but rather keep it a secret until the reveal date!
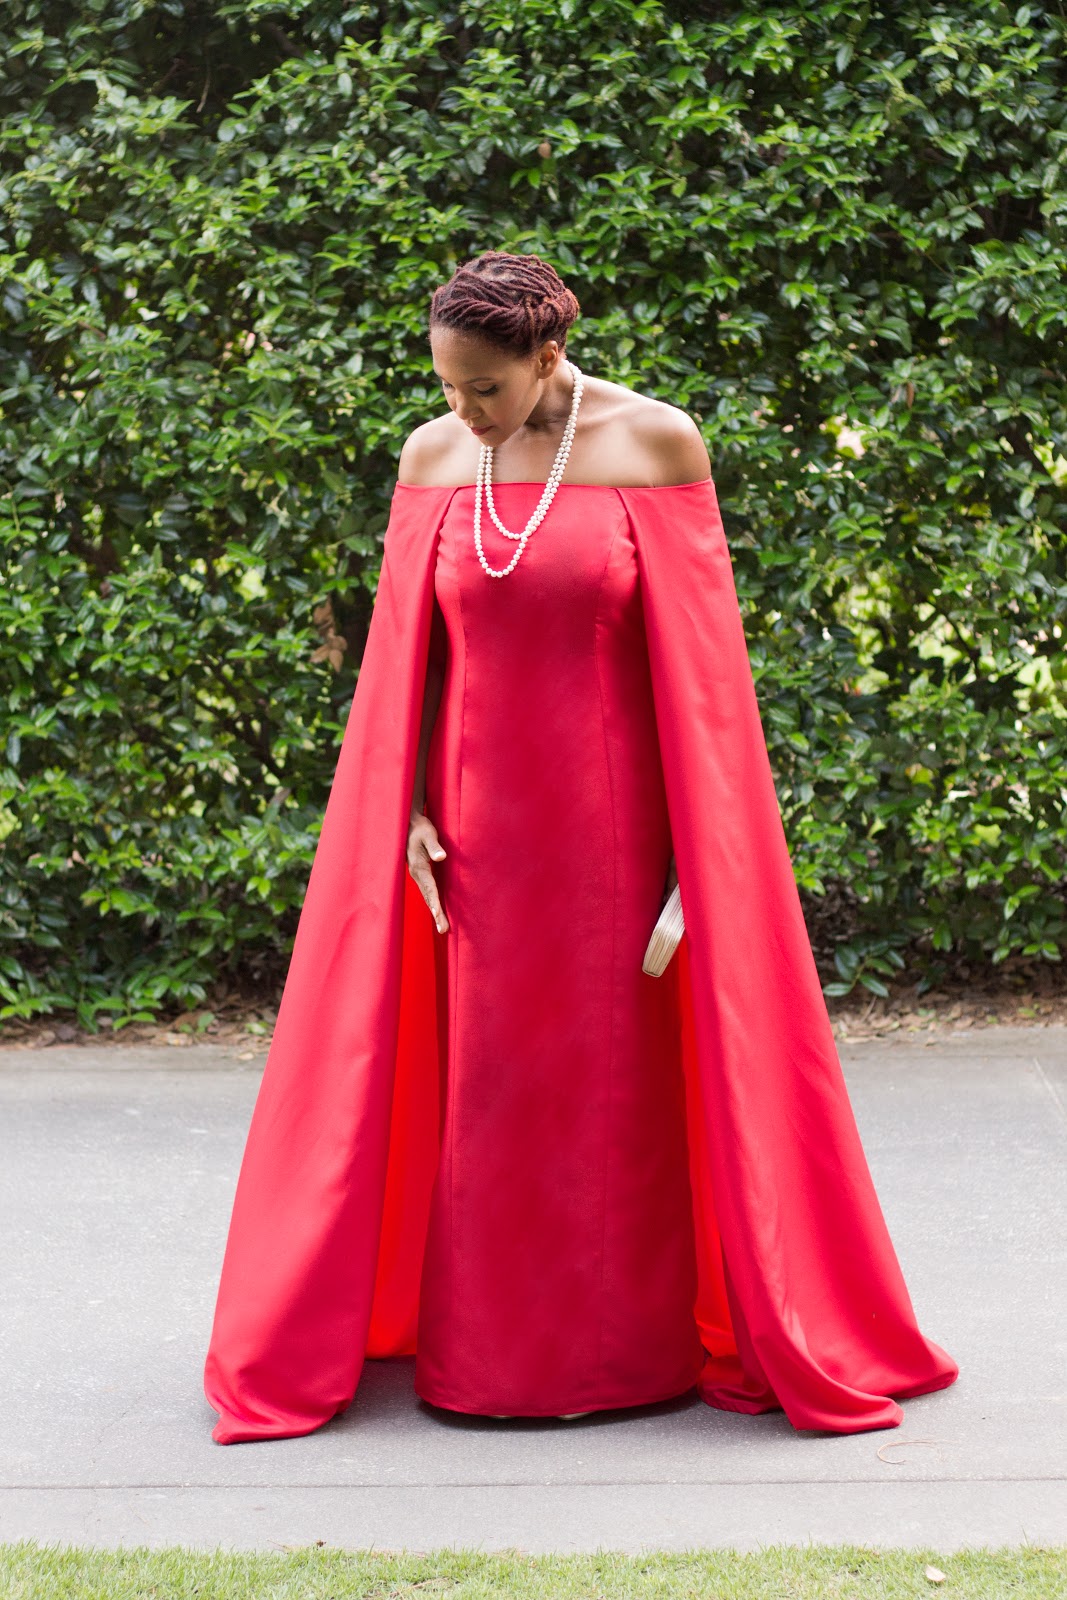
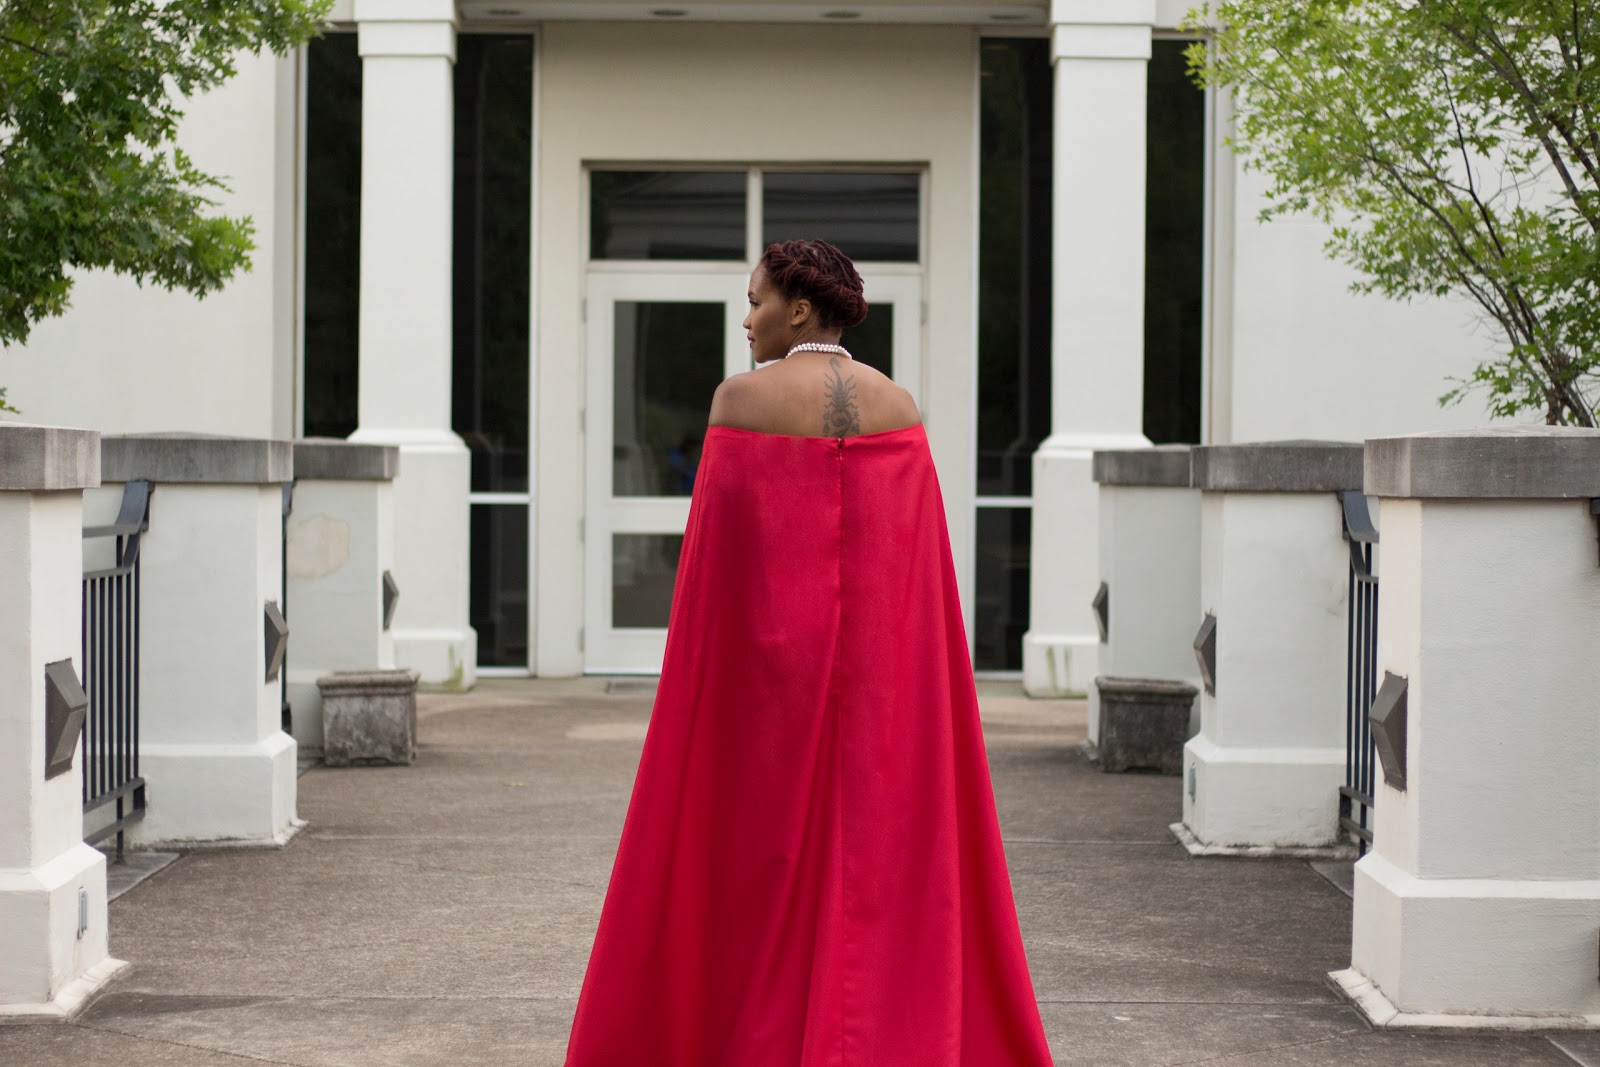
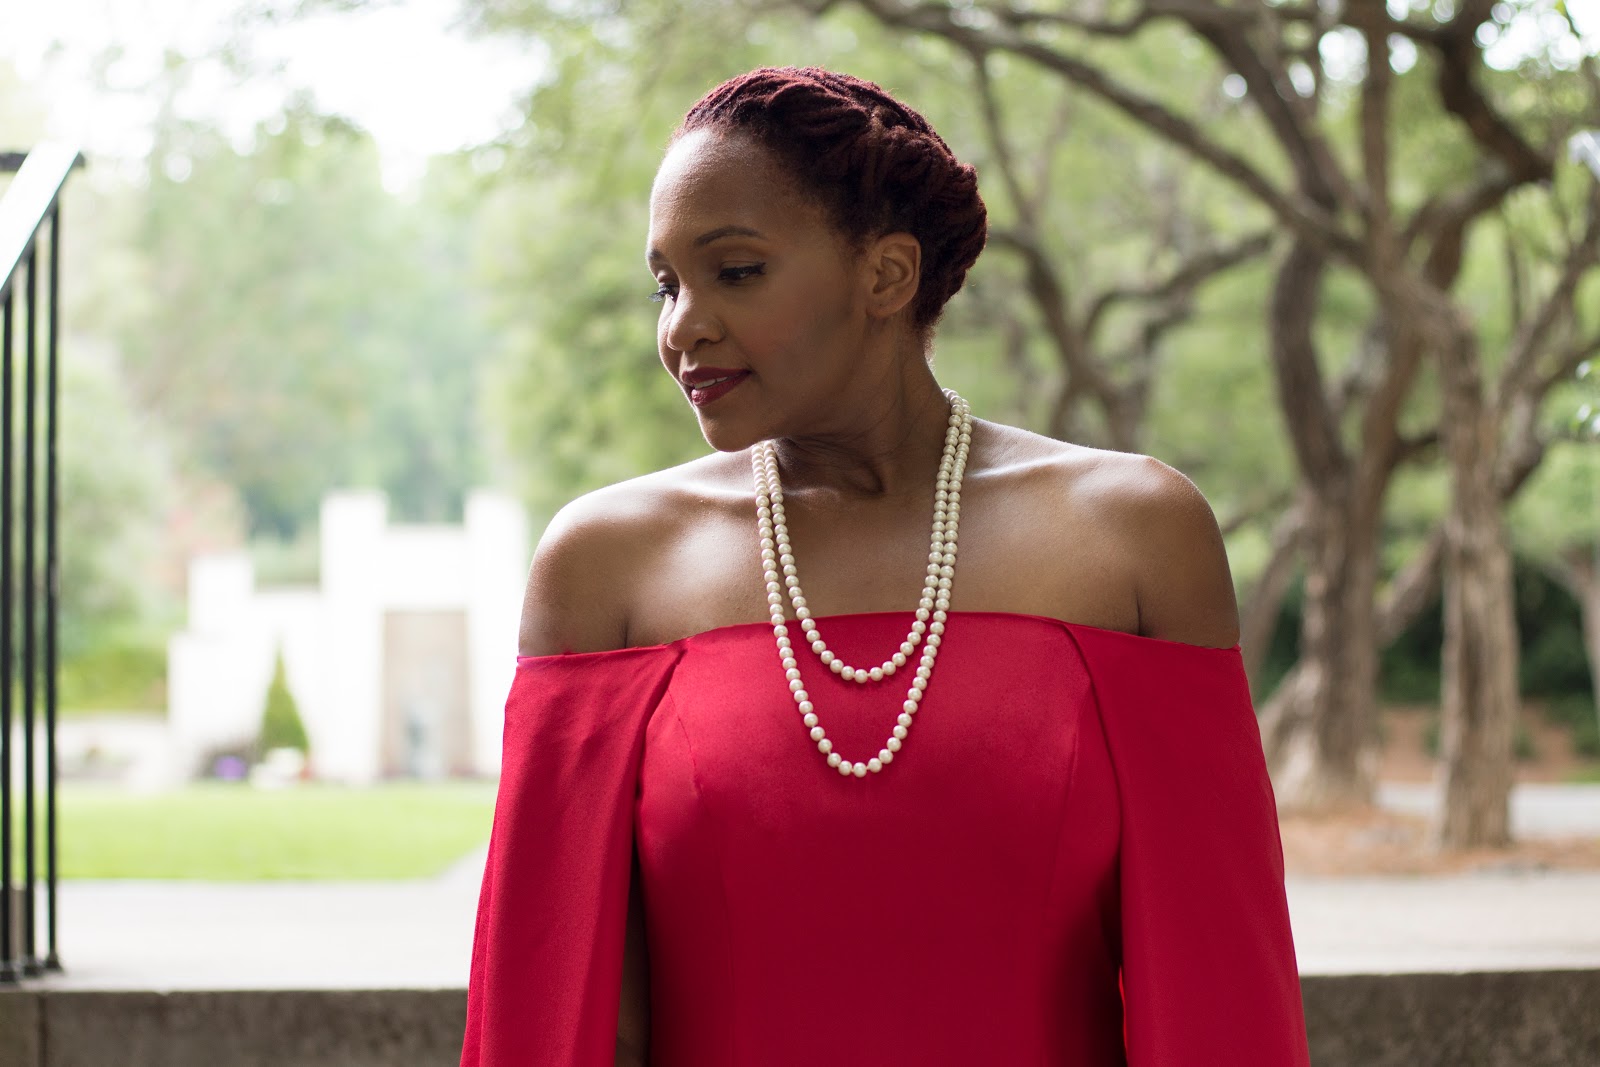
Now came the decision of exactly which dress I would pick. The original excitement quickly turned to terror once I started going through all of her gorgeous looks !! Which would I pick? Would I do it the justice that it deserved !?!?! Lupita Nyongo is gorgeous in every way so I wanted to make sure that whatever I chose I did it RIGHT !! After careful consideration, I decided on the ICONIC \” Audrey Cape Evening Gown\” that Lupita wore to the 2014 Golden Globes!

Ralph Lauren Debuted this dress in his Spring 2013 RTW Collection and it is simply GORGEOUS! When Lupita wore this dress on the Red Carpet I remember gasping ( along with the rest of the country) at how beautiful she looked in it. I remember scouring the internet the next day trying to find out the cost of this dress. I nearly fell out of my chair when I saw the price tag ….$7,000…and already SOLD OUT! So the memories alone of this dress made it a MUST SEW.
I set out looking for a pattern and the perfect fabric. I decided on a simple Tomato Red Crepe Fabric from Joann\’s. While deciding on the pattern I realized that I would need to put two patterns together to achieve the cape look. I settled on the patterns below:


Construction Time!
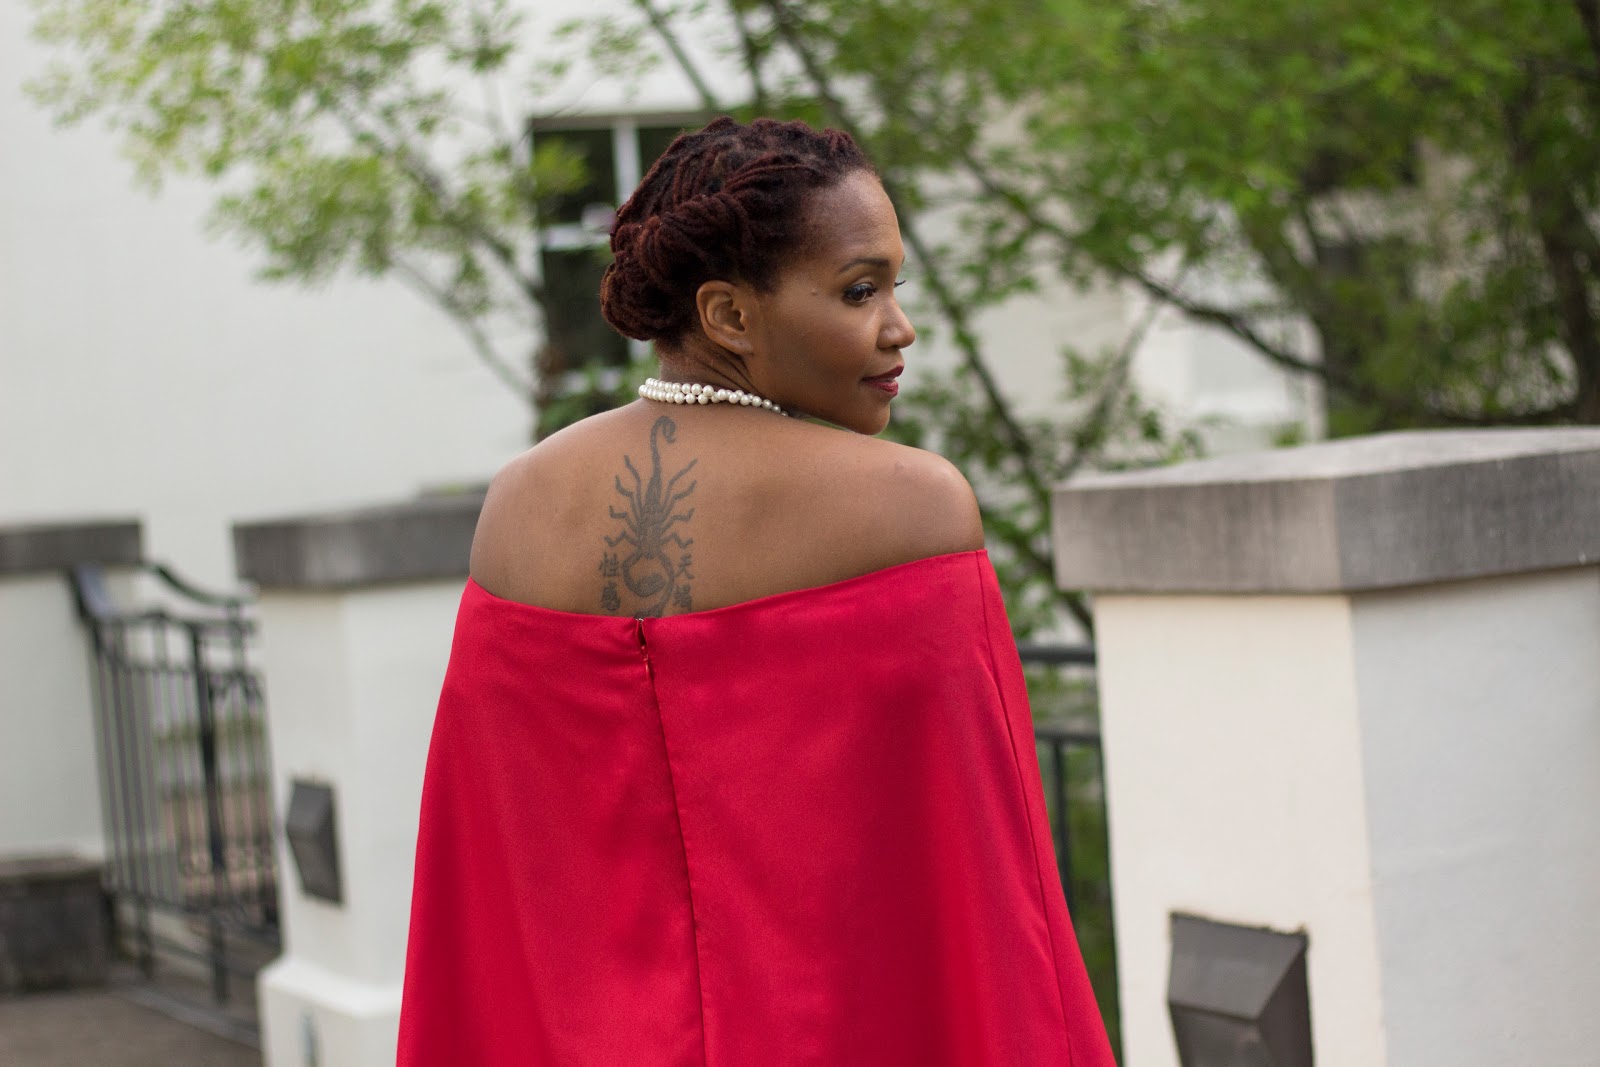
First I had to construct a muslin because I still had no idea how I would put this all together. Let me tell you … I must have saved at least 40 different pictures and views of this gown just so that I could study every angle. I constructed View B and added 14 inches to the bottom of the dress so that it hit the floor . Once done I tried that on and marked exactly where I wanted it to fall on my shoulders.
Now let me take a moment to apologize for not having pictures of that process but I was so in the zone that I forgot! My bad!
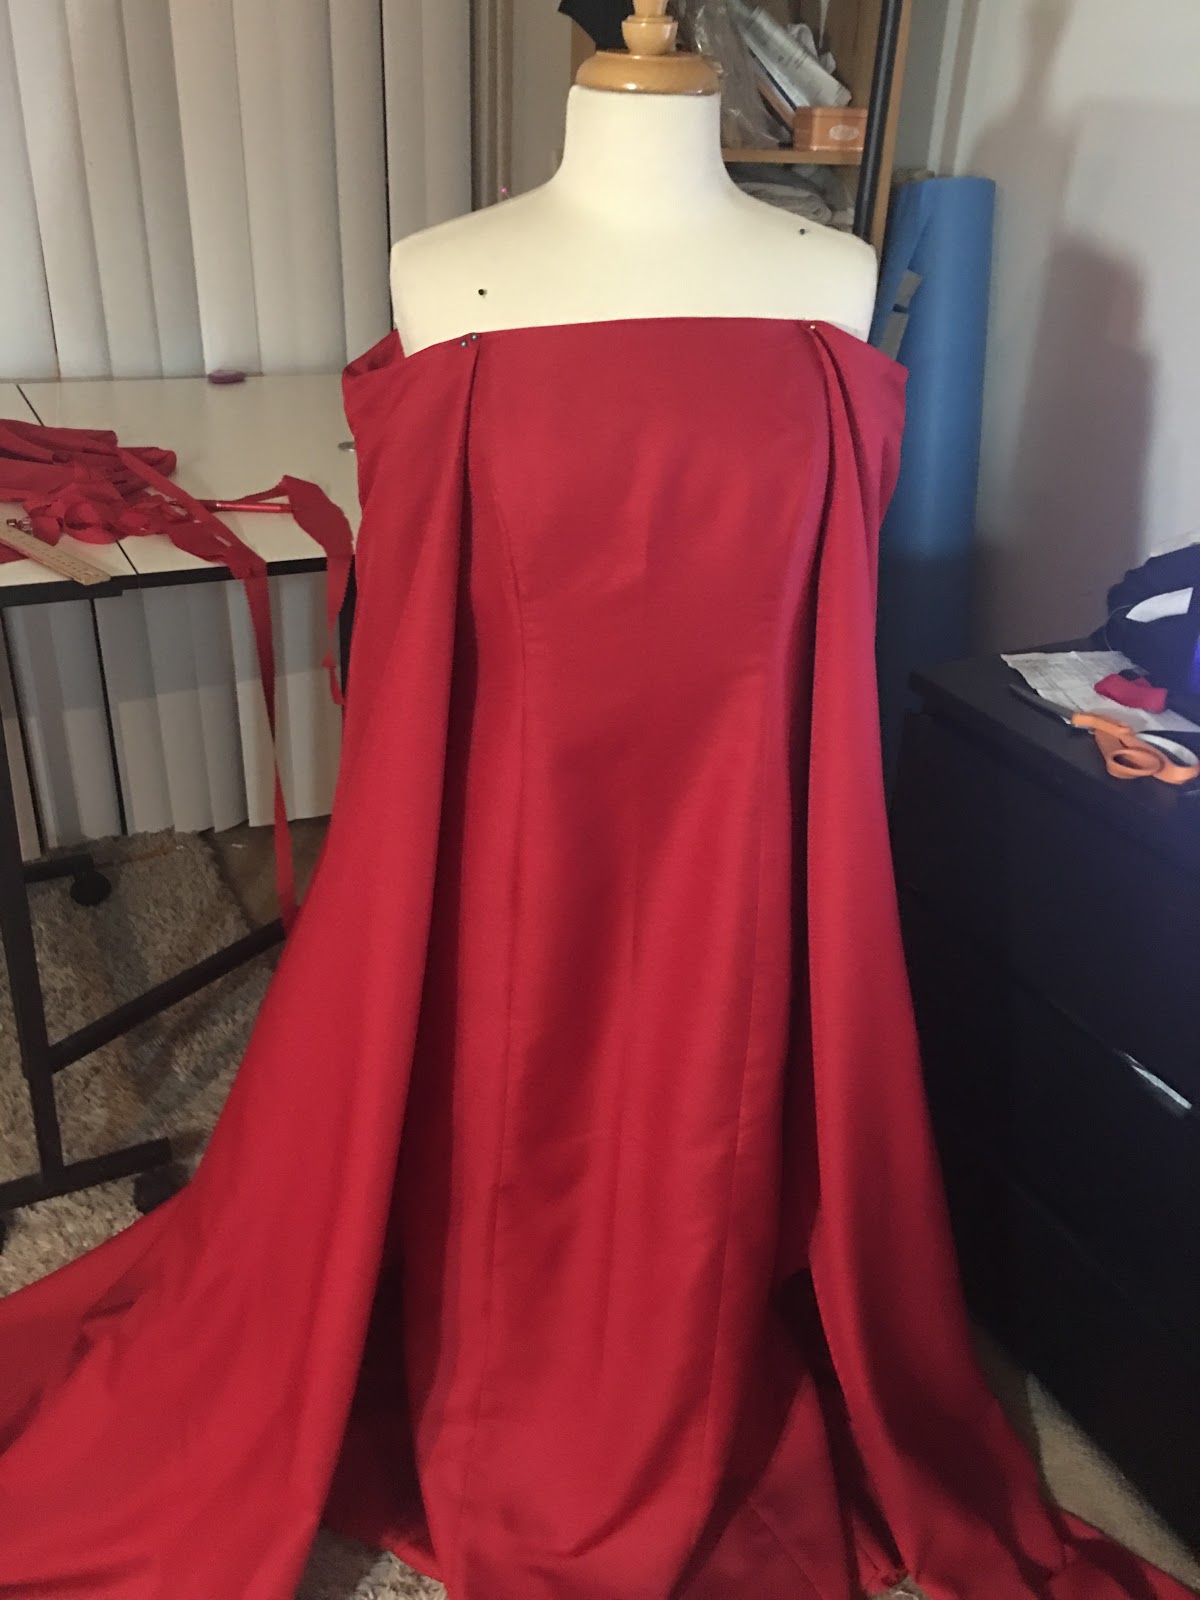
Anywho, once the dress was constructed and marked I took it off and cut across the mark I had made on the front and back (including sleeves and adding 5/8 on top to accommodate seam allowance ).Now it was time to construct the cape …..
I cut the entire cape out ( View A /No pockets). Once cut out I sewed it together and tried it on with my now cut dress to make sure that it fits. I then put both pieces on my body form ( lined up side seams) and begin cutting away the shoulders of the cape to make sure it matched the fall of the dress. I also had to cut away a good bit of the front so that it fell like Lupita\’s still showing the form and shape of the dress. Once all that was done I was ready to tear my muslin apart and cut my real pieces!
The construction of the dress and cape from that point was pretty easy …..Once all pieces were cut and sewn together I tried everything on the body form again to make sure it lined up.

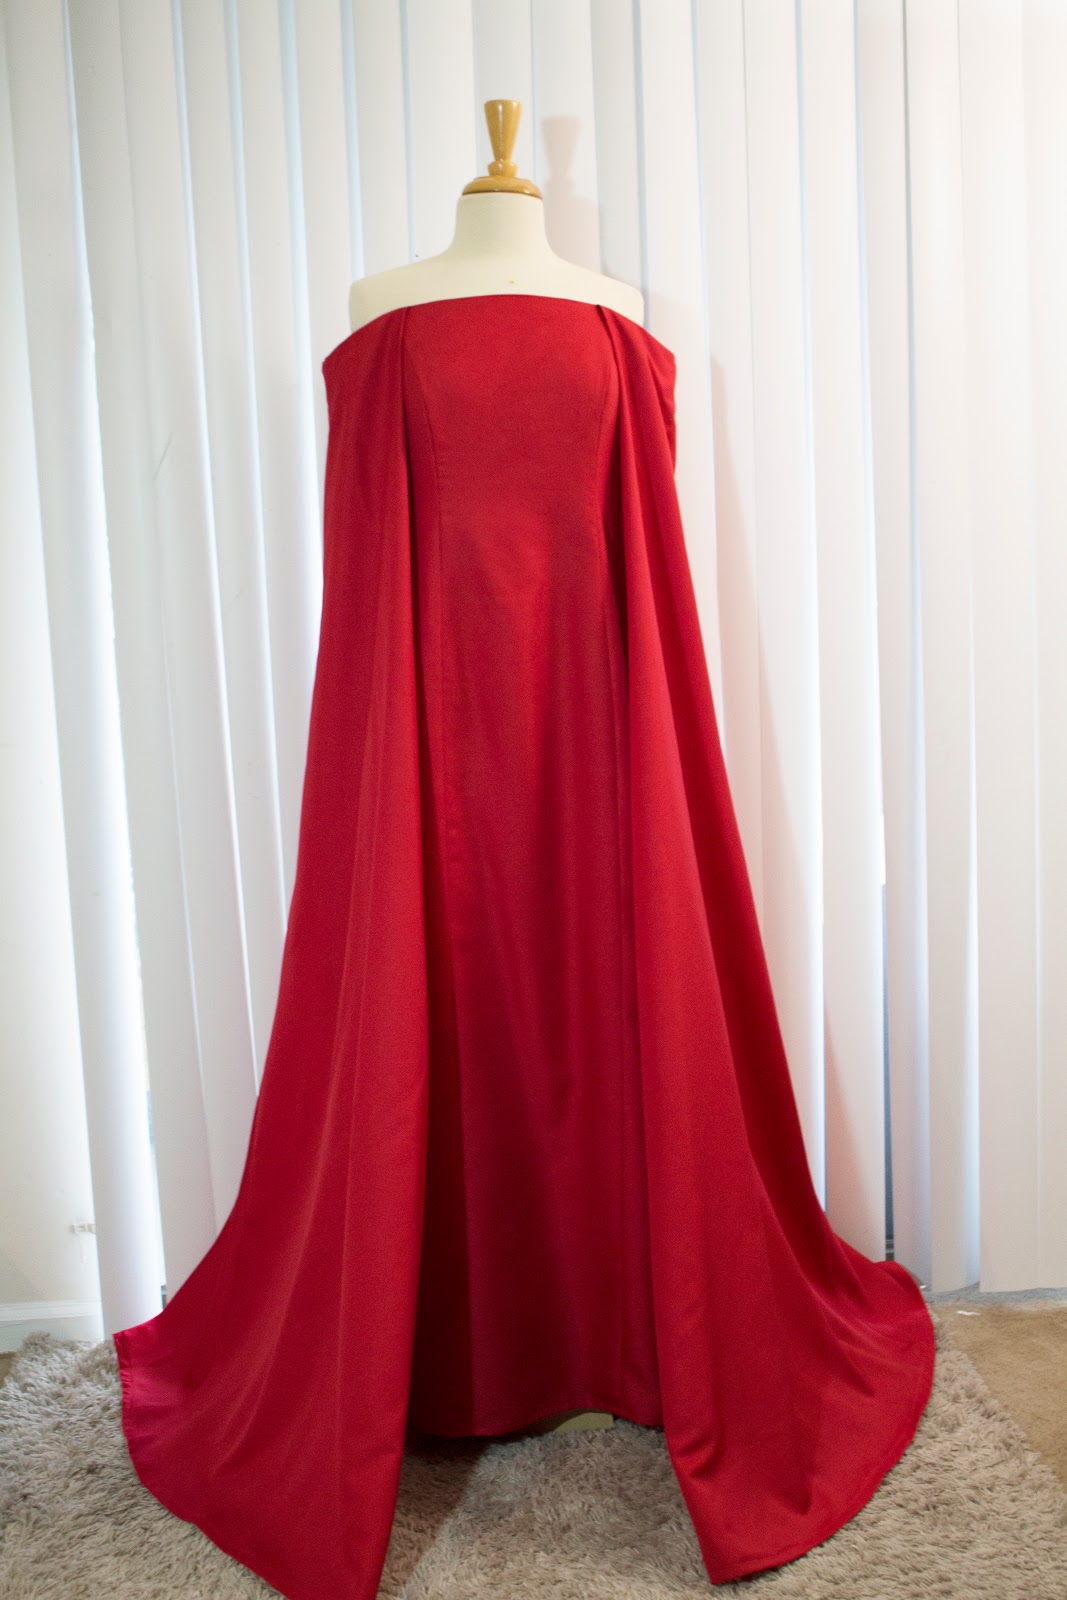
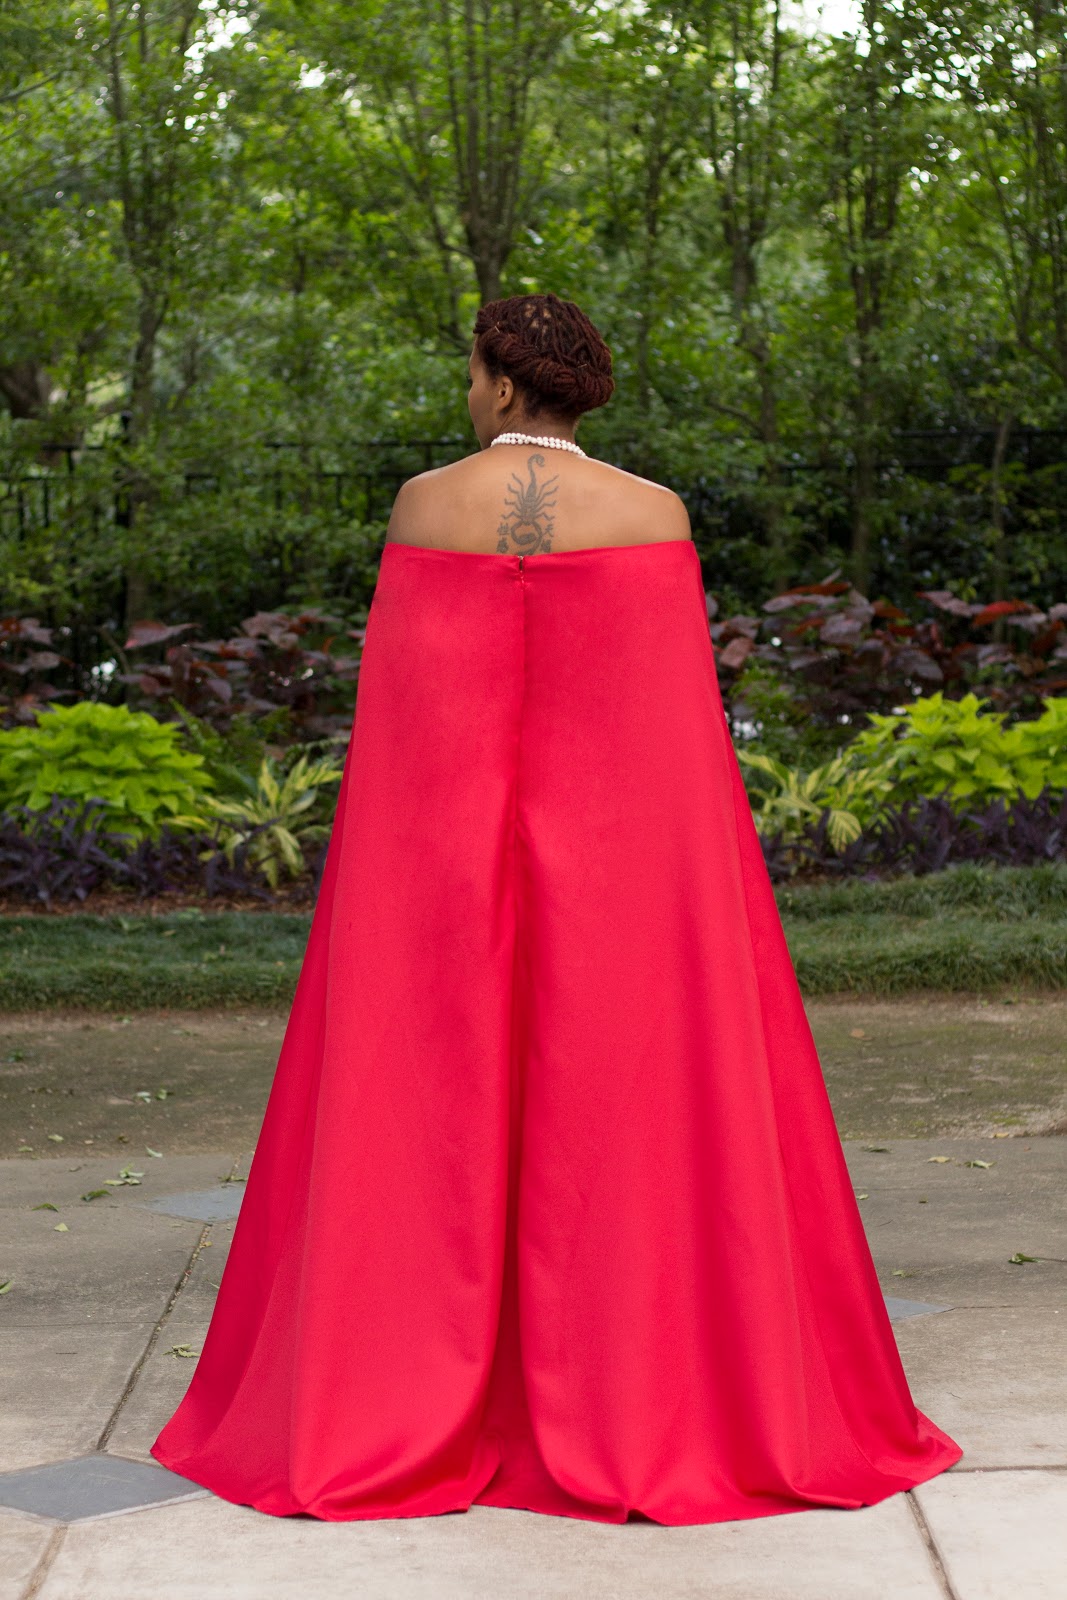
She took my breath away before I even put her on !!!
Picture time !!!


This dress is amazing. How cool to collaborate with Tabitha Sewer. I love her IG feed and her style. May I ask where your photo shoot was conducted? I just watched Octavia Spencer in SELF MADE and it looks like a location from that movie about Madam CJ Walker.
LikeLike